Brand your onboarding form
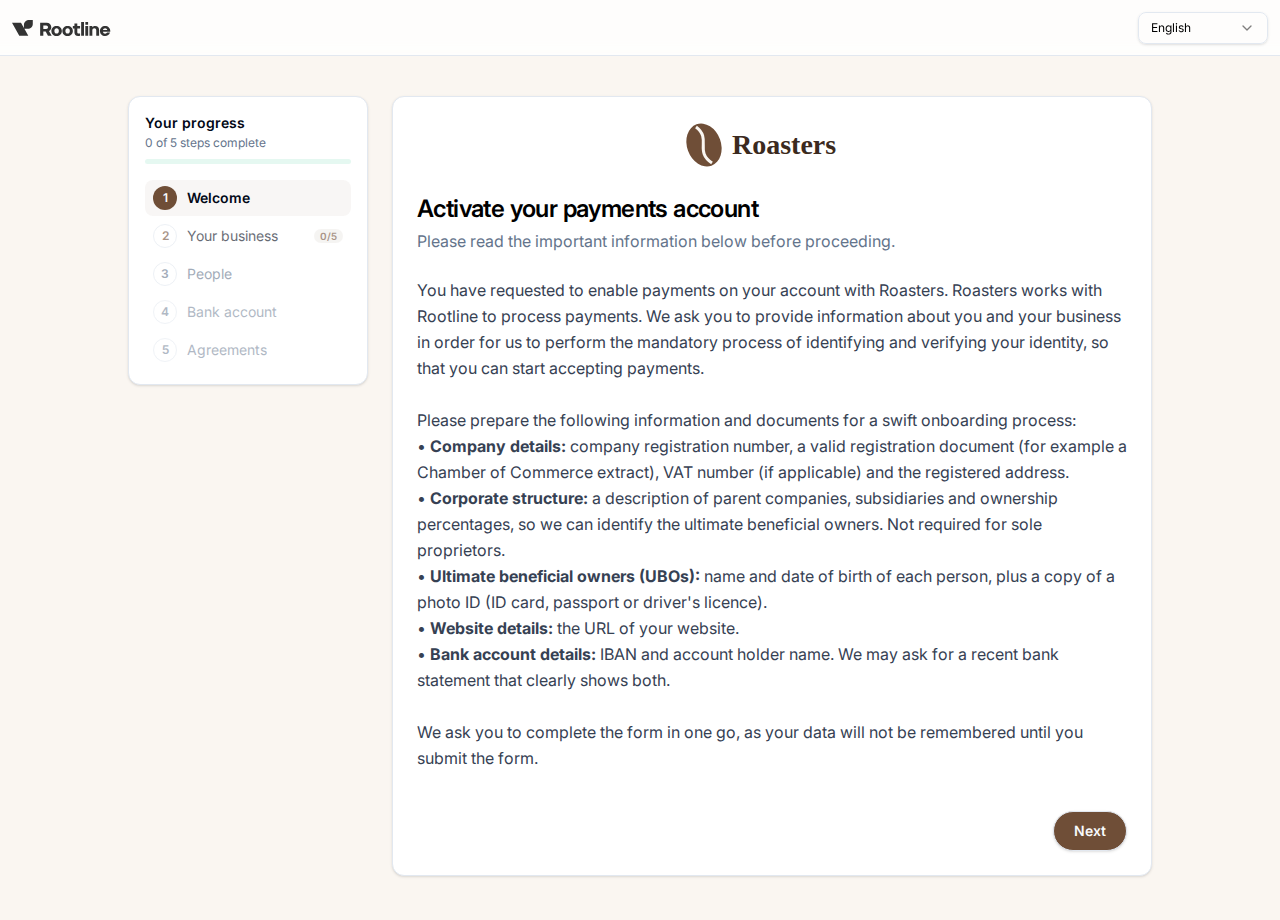
Your merchants fill in Rootline's hosted onboarding form. You can make that form match your own brand: your logo, your colors and the shape of the buttons, input fields and panels.
This page covers how you create a branding object, point your onboarding form at it, and change it later.
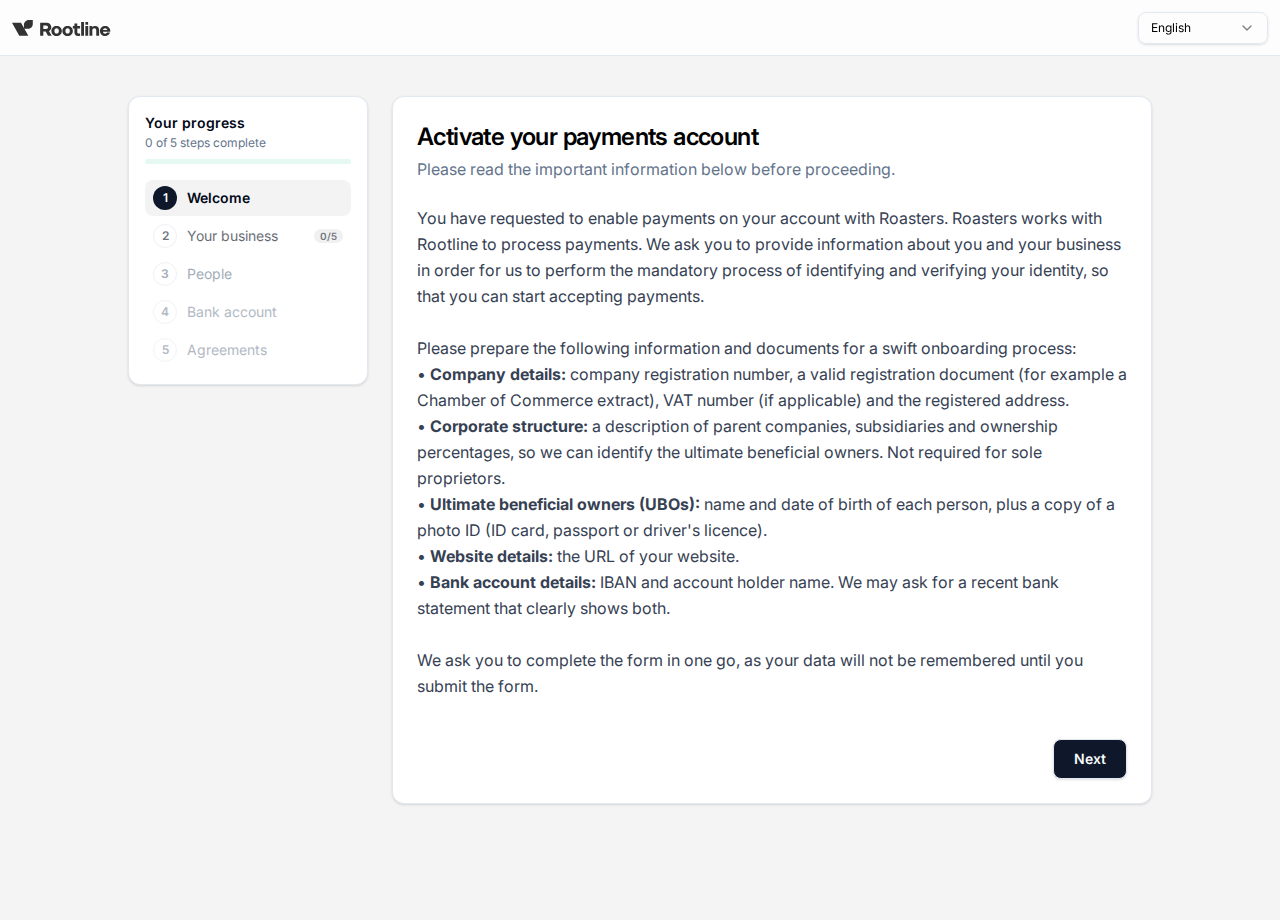
Without branding, the form uses Rootline's default look:
With the example branding from this page:
Overview
The branding of your onboarding form lives in a display_options object that you own. You create it once, then point your onboarding form at it through the form's display_options_id. The form reads the object every time it loads, so a change to the branding shows the next time a merchant opens the form.
The branding of your merchants form also applies to the forms that follow it: the additional-information requests your merchants receive during review, and the page where a verified merchant updates their details.
The Config API base URL is https://config-api.rootline.com (use https://config-api.staging.rootline.com for staging).
Your API key needs access to the Config API. If a request returns 403, contact Rootline to enable Config API access for your API user.
Try your branding on staging first. On production, the form your merchants open changes as soon as you point it at a branding object.
What you can customize
| Field | Type | Description |
|---|---|---|
logo_url | string | An https URL to your logo. You host the image yourself. |
appearance | object | The look of the form, in the same shape as the appearance the Rootline components take. |
The form applies these appearance.variables:
| Variable | Description |
|---|---|
color_primary | Buttons and accents. |
color_primary_foreground | Text on buttons and other primary-colored elements. |
color_foreground | The main text color. |
color_muted_foreground | Secondary text, such as hints below a field. |
color_background | The page background. |
color_success | Progress and confirmations: the progress bar, completed steps, a verified bank account or document. |
color_warning | Warnings, such as a document that still needs a check. |
color_error | Errors, such as a field that needs a different value. |
control_border_radius | The corners of buttons and input fields, for example 8px, or 9999px for pill-shaped buttons. |
panel_border_radius | The corners of the panels the form is laid out in, for example 16px. |
Every field is optional. A field you leave out keeps the Rootline default, so you can start with only your logo and add colors later.
Colors are #rgb, #rrggbb, rgb(), rgba(), hsl() or hsla(). Lengths are a number with px, rem, em or %. The API rejects other formats, including color names.
The onboarding form does not apply the other appearance settings yet: theme, font_family, fonts, and the font_size_* and font_weight_* variables. The API rejects them, so a setting you send always shows on the form.
Through the API, a display_options object brands the onboarding form, and it carries "onboarding": {} in its customization. The branding of your checkout is managed in the Rootline Dashboard and cannot be reused for the form, so if you want the two to match, keep the same values in both.
Integration steps
Step 1. Create the branding object
"onboarding": {} is required. It marks the object as branding for an onboarding form.
The response is the new object. Store its id:
Step 2. Find your onboarding form
List the onboarding forms of your namespace. Most partners have one or two.
url is the link your merchants open. display_options_id is absent until you set it in the next step.
Step 3. Point the form at the branding
display_options_id is the only field you can change on an onboarding form; any other field in the request is refused. The response is the form with the reference set. Open the form's url to see the result.
Change the branding
Update the branding object itself. Only the fields you send change, down to a single variable; the rest keeps its value.
Every form that points at this object shows the new branding the next time it loads. To give a form a different look without changing the others, create a second branding object and point that form at it.
Errors
| Status | Cause |
|---|---|
400 | The create request has no "onboarding": {} in its customization: customization needs the onboarding surface: set customization.onboarding. Checkout branding is managed in the Rootline Dashboard. |
400 | A color or length is not in one of the formats above, or the request sends an appearance setting the form does not apply. The message names the field, for example customization.appearance.variables.color_primary must be a color: #rgb, #rrggbb, rgb(), rgba(), hsl() or hsla(). |
400 | The request sets primary_color, background_color, button_color or button_radius in customization. Those are checkout branding; the message names the appearance.variables field to use instead. |
400 | A PATCH /v1/onboarding-forms/{id} sends another field than display_options_id: unexpected field: <name>. |
403 | Your API user has no access to the Config API. Contact Rootline to enable it. |
404 | The display_options id does not exist in your namespace. |
422 | display_options_id does not exist, belongs to another namespace, or points at checkout branding: an onboarding form needs a display options object with customization.onboarding. |
An error response looks like this: